Elasticsearch 8.x Installation and Cluster Setup
Elasticsearch is a real-time, distributed search and analytics engine—a powerful open source tool designed for efficiently storing, searching, and analyzing large volumes of data.
Built on the Apache Lucene library, it is primarily used for full-text search, log analysis, and application monitoring.
In this article, we will introduce how to install Elasticsearch from a compiled archive (.tar.gz) and set up a cluster.
Elasticsearch Installation
Installation Environment and Elasticsearch Version
- OS: Ubuntu 24.04 LTS
- Elasticsearch: 8.17.2
For cluster configuration, prepare three virtual machines (VMs) as follows:
| No. | host name | IP |
|---|---|---|
| #1 | es-node1 | 192.168.234.128 |
| #2 | es-node2 | 192.168.234.129 |
| #3 | es-node3 | 192.168.234.130 |
Download and Extract Archive
First, download the Elasticsearch archive, extract it, and move it to the installation directory.
wget https://artifacts.elastic.co/downloads/elasticsearch/elasticsearch-8.17.2-linux-x86_64.tar.gz

tar -xzf elasticsearch-8.17.2-linux-x86_64.tar.gz
sudo mv elasticsearch-8.17.2 /opt/elasticsearch

cd /opt/elasticsearch
Create User and Set Permissions
For security, create a separate user account and change the ownership of the Elasticsearch directory to that user.
sudo adduser elastic
sudo passwd elastic
sudo chown -R elastic:elastic /opt/elasticsearch
Systemd Service Configuration
Create the /etc/systemd/system/elasticsearch.service file to register Elasticsearch as a service.
sudo vim /etc/systemd/system/elasticsearch.service
[Unit]
Description=Elasticsearch
After=network.target

[Service]
User=elastic
Group=elastic
ExecStart=/opt/elasticsearch/bin/elasticsearch
Restart=always
LimitMEMLOCK=infinity
LimitNOFILE=65536

[Install]
WantedBy=multi-user.target
sudo systemctl daemon-reload
Firewall Configuration
Allow the ports used by Elasticsearch and Kibana in the firewall.
sudo firewall-cmd --permanent --add-port=9200/tcp
sudo firewall-cmd --permanent --add-port=9300/tcp
sudo firewall-cmd --permanent --add-port=5601/tcp
sudo firewall-cmd --reload
Elasticsearch Cluster Configuration
Generate & Deploy Certificates
To secure inter-node communication, generate SSL/TLS certificates and deploy them to each node:
Generate the CA certificate on one of the nodes:
sudo -u elastic ./bin/elasticsearch-certutil ca
sudo -u elastic ./bin/elasticsearch-certutil cert --ca elastic-stack-ca.p12
Copy the generated elastic-certificates.p12 file to the /opt/elasticsearch/config directory on each node:
sudo -u elastic scp elastic-certificates.p12 elastic@192.168.234.129:/opt/elasticsearch/config
sudo -u elastic scp elastic-certificates.p12 elastic@192.168.234.130:/opt/elasticsearch/config
sudo mv elastic-certificates.p12 config/elastic-certificates.p12
Configure elasticsearch.yml
Assign a unique node.name for each node and add the necessary cluster settings:
sudo vim /opt/elasticsearch/config/elasticsearch.yml
- es-node1
- es-node2
- es-node3
cluster.name: es-cluster
node.name: node-1
network.host: 0.0.0.0

path.data: /opt/elasticsearch/data
path.logs: /opt/elasticsearch/logs

# List of cluster node IPs
discovery.seed_hosts: ["192.168.234.128", "192.168.234.129","192.168.234.130"]

# Specify master-eligible nodes for initial cluster formation (remove or comment out after initial setup)
cluster.initial_master_nodes: ["node-1", "node-2","node-3"]

# SSL/TLS settings
xpack.security.transport.ssl.enabled: true
xpack.security.transport.ssl.verification_mode: certificate
xpack.security.transport.ssl.client_authentication: required
xpack.security.transport.ssl.keystore.path: elastic-certificates.p12
xpack.security.transport.ssl.truststore.path: elastic-certificates.p12
cluster.name: es-cluster
node.name: node-2
network.host: 0.0.0.0

path.data: /opt/elasticsearch/data
path.logs: /opt/elasticsearch/logs

# List of cluster node IPs
discovery.seed_hosts: ["192.168.234.128", "192.168.234.129","192.168.234.130"]

# Specify master-eligible nodes for initial cluster formation (remove or comment out after initial setup)
cluster.initial_master_nodes: ["node-1", "node-2","node-3"]

# SSL/TLS settings
xpack.security.transport.ssl.enabled: true
xpack.security.transport.ssl.verification_mode: certificate
xpack.security.transport.ssl.client_authentication: required
xpack.security.transport.ssl.keystore.path: elastic-certificates.p12
xpack.security.transport.ssl.truststore.path: elastic-certificates.p12
cluster.name: es-cluster
node.name: node-3
network.host: 0.0.0.0

path.data: /opt/elasticsearch/data
path.logs: /opt/elasticsearch/logs

# List of cluster node IPs
discovery.seed_hosts: ["192.168.234.128", "192.168.234.129","192.168.234.130"]

# Specify master-eligible nodes for initial cluster formation (remove or comment out after initial setup)
cluster.initial_master_nodes: ["node-1", "node-2","node-3"]

# SSL/TLS settings
xpack.security.transport.ssl.enabled: true
xpack.security.transport.ssl.verification_mode: certificate
xpack.security.transport.ssl.client_authentication: required
xpack.security.transport.ssl.keystore.path: elastic-certificates.p12
xpack.security.transport.ssl.truststore.path: elastic-certificates.p12
Note: The
cluster.initial_master_nodessetting is only necessary during the initial cluster formation. After the cluster is established, this setting should be removed or commented out. (Refer to Bootstrapping a cluster)
Start Cluster and Verify
Start the Elasticsearch service on each node and then verify the cluster status.
Start the service:
sudo systemctl start elasticsearch
Reset the password for the elastic account:
sudo bin/elasticsearch-reset-password -u elastic -i
Check the node status:
curl -u elastic:your_pass http://192.168.234.128:9200/_cat/nodes?v
ip              heap.percent ram.percent cpu load_1m load_5m load_15m node.role   master name
192.168.234.130           19          89  88    1.30    0.80     0.37 cdfhilmrstw -      node-3
192.168.234.129           24          89   9    0.29    0.17     0.13 cdfhilmrstw -      node-2
192.168.234.128           10          90  17    0.00    0.00     0.00 cdfhilmrstw *      node-1
Check the cluster health:
curl -u elastic:your_pass http://192.168.234.128:9200/_cluster/health?pretty
{
  "cluster_name" : "es-cluster",
  "status" : "green",
  "timed_out" : false,
  "number_of_nodes" : 3,
  "number_of_data_nodes" : 3,
  "active_primary_shards" : 3,
  "active_shards" : 6,
  "relocating_shards" : 0,
  "initializing_shards" : 0,
  "unassigned_shards" : 0,
  "unassigned_primary_shards" : 0,
  "delayed_unassigned_shards" : 0,
  "number_of_pending_tasks" : 0,
  "number_of_in_flight_fetch" : 0,
  "task_max_waiting_in_queue_millis" : 0,
  "active_shards_percent_as_number" : 100.0
}
Kibana Integration
For security reasons, the elastic account cannot be used with Kibana; instead, the built-in kibana_system account is utilized.
Reset the password for the kibana_system account:
cd /opt/elasticsearch
sudo bin/elasticsearch-reset-password -u kibana_system -i
Install Kibana
wget https://artifacts.elastic.co/downloads/kibana/kibana-8.17.2-linux-x86_64.tar.gz
tar -xzf kibana-8.17.2-linux-x86_64.tar.gz
sudo mv kibana-8.17.2 /opt/kibana
Configure kibana.yml
sudo vim /opt/kibana/config/kibana.yml
server.port: 5601
server.host: "0.0.0.0"
elasticsearch.hosts: ["http://192.168.234.128:9200","http://192.168.234.129:9200","http://192.168.234.130:9200"]
elasticsearch.username: "kibana_system"
elasticsearch.password: "your_pass"
Kibana Startup
cd /opt/kibana
nohup bin/kibana &
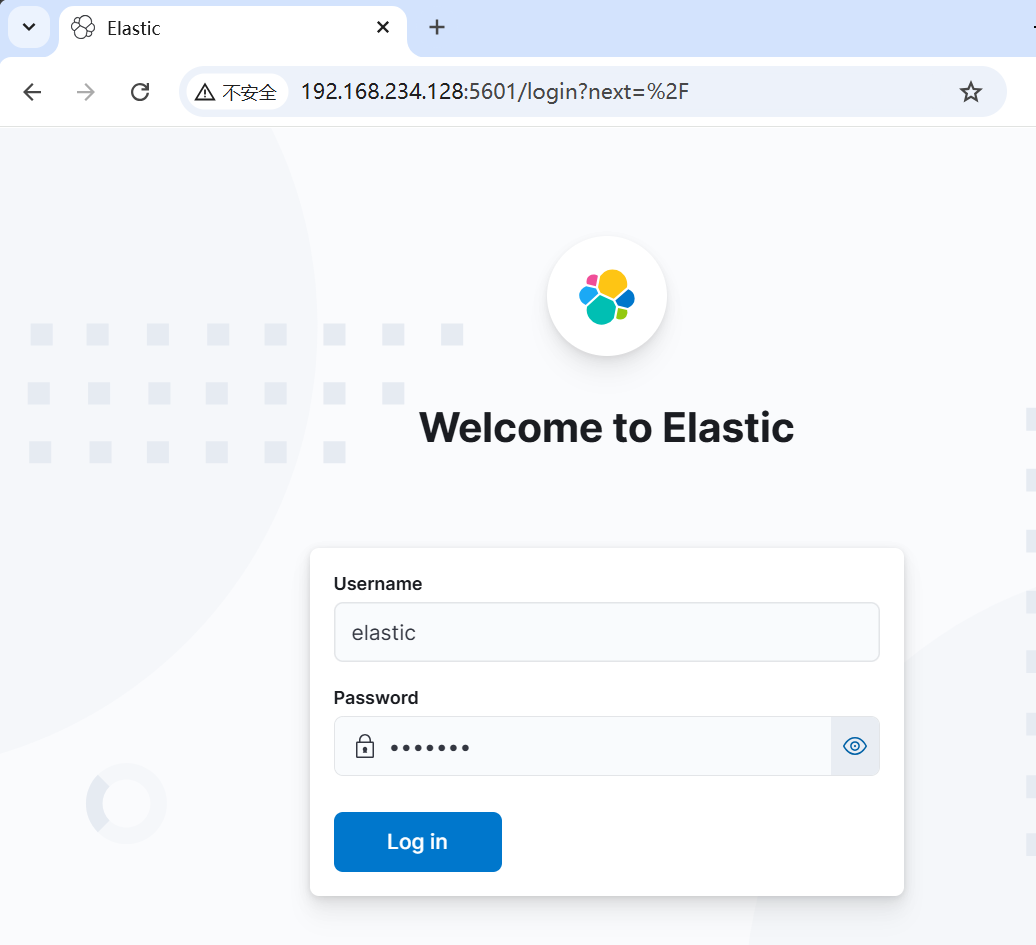
Now, access http://192.168.234.128:5601 (or the IP address of the node where Kibana is installed) in a web browser and log in with the elastic account.

Today, we introduced a simple way to install Elasticsearch and Kibana and set up a cluster.
The archive installation method is easy to install and manage, making it useful in various environments. Hope you find it helpful.