Docusaurus로 나만의 블로그 만들기
그동안 Jekyll을 사용하다가 우연히 Docusaurus를 접하고 즉시 마음이 끌려 전환을 결심했습니다.
기본적으로 깔끔한 UI, 강력한 코드 블록 기능, 활발한 커뮤니티, 다양한 플러그인, 그리고 Meta(Facebook) 백그라운드 �등이 갈아타게 된 이유가 되었습니다.
기본적인 설치부터 저의 개인적인 수요로 했던 기본적인 작업들을 간단히 정리해보았습니다.
Docusaurus의 공식 문서는 잘 정리되어 있습니다만, 기본적인 setup을 끝내고 나한테 필요한 기능이 무엇인지를 알아가면서 공식 문서를 찾아보길 추천드립니다.
Docusaurus 소개
Docusaurus는 React, MDX기반으로 된 정적사이트 생성 플랫폼으로 현재 Meta에서 유지보수중인 오픈소스 솔류션입니다. 주로 문서화 사이트를 쉽고 빠르게 만들수 있도록 설계되었습니다.
- Docs와 Blog 기능: 강력한 문서화 기능을 제공하며, 블로그 외에도 다양한 유형의 사이트를 손쉽게 생성할 수 있습니다.
- MDX 기반: Markdown 문법과 React 컴포넌트를 결합하여 확장성 있는 콘텐츠 작성이 가능합니다.
- i18n 지원: 다국어 사이트를 손쉽게 구현할 수 있음.
- SEO 친화적: sitemap, meta 태그 등의 자동 생성.
- Code blocks: 강력한
Syntax highlighting기능 제공 - 배포 편이성: Vercel, GitHub Pages등 다양한 플랫폼에 간편하게 배포가능.
설치
Node.js (ver >= 18.0) 설치후 아래와 같은 명령어로 새로운 Docusaurus 프로젝트를 생성합니다.
# 현시점 기준 최신버전: v3.6.3
npx create-docusaurus@latest my-site classic --typescript
아래와 같이 개발서버를 실행합니다.
cd my-site
npm run start
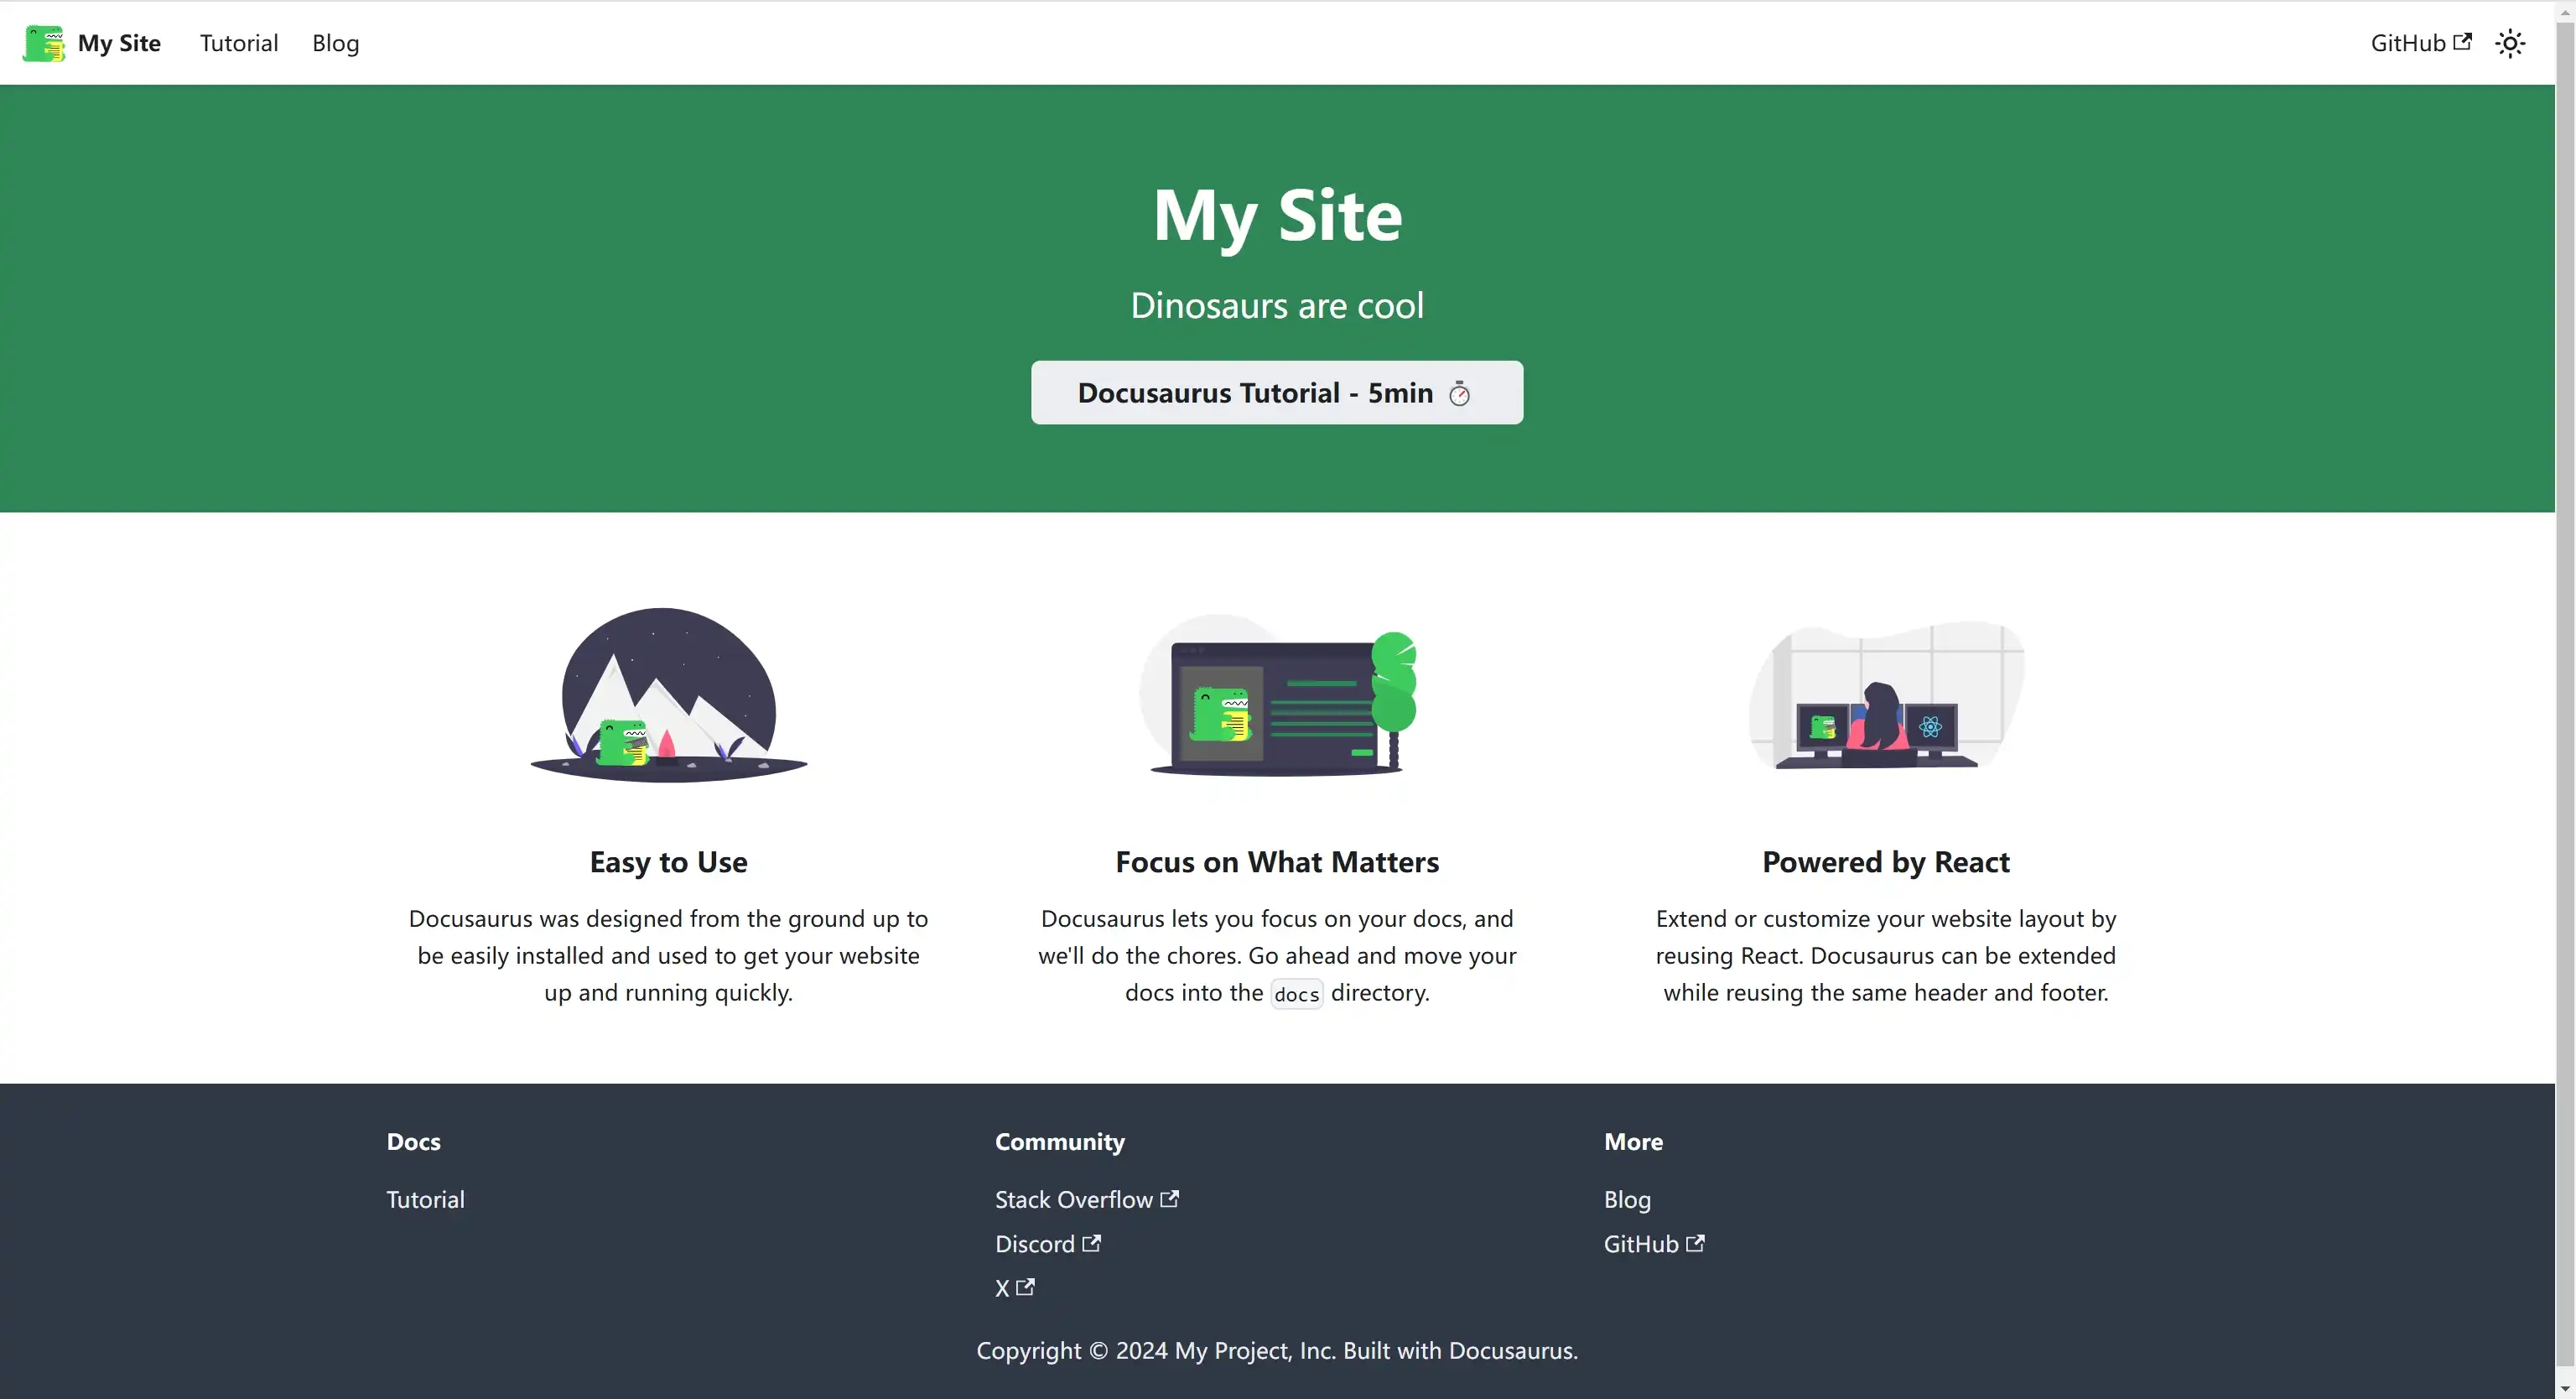
환경에 이상이 없다면 http://localhost:3000 접속후 아래와 같은 화면을 보게됩니다.

Blog-only 모드
별도의 랜딩 페이지가 필요 없이 index페이지에 바로 블로그 노출을 원하시는 분들은 아래와 같이 간단한 변경을 하시면 됩니다.
일단 ./src/pages/index.{js,tsx} 파일은 삭제하여 동일 route에 여러개 파일이 매핑되는걸 방지합니다.
다음 docusaurus.config.ts에서 blog의 routeBasePath를 /blog 에서 /로 변경:
export default {
  // ...
  presets: [
    [
      '@docusaurus/preset-classic',
      {
        docs: false, // Optional: disable the docs plugin
        blog: {
          routeBasePath: '/', // Serve the blog at the site's root
          // ...
        },
      },
    ],
  ],
};
다국어(i18n) 설정
요즘은 ChatGPT와 같은 툴을 활용하여 다국어 블로그를 운영하기가 훨씬 수월해졌습니다.
Docusaurus는 기본적으로 i18n기능을 지원하며 간단한 설정으로 언어추가가 가능합니다.
1. 다국어 옵션 추가
export default {
  i18n: {
    defaultLocale: 'ko',
    locales: ['ko', 'en'],
    localeConfigs: {
      'ko': {
        label: '한국어',
        htmlLang: 'ko',
      }
    }
  },
  themeConfig: {
    navbar: {
      items: [
        // ...
        {
          type: 'localeDropdown', position: 'left',
        },
        // ...
      ],
    },
  },
  // ...
};
2. 다국어 파일 생성
write-translations 명령어는 기본적으로 설정된 locales에 따라 i18n 디렉토리에 JSON 파일을 생성합니다. 이 파일은 각 언어별로 번역된 콘텐츠를 담고 있으며, 직접 수정을 통해 원하는 언어로 번역할 수 있습니다.
classic 테마에는 기본으로 많은 언어팩이 포함되어 있습니다. write-translations 명령어실행 없이 위에 i18n 옵션 설정��만으로 어느정도 다국화가 가능합니다만 다국어 파일 생성해서 사용하는것을 권장드립니다.
npm run write-translations -- --locale ko
npm run write-translations -- --locale en
> my-site@0.0.0 write-translations
> docusaurus write-translations --locale en

[INFO] 78 translations will be written at "i18n/en/code.json".
[INFO] 5 translations will be written at "i18n/en/docusaurus-theme-classic/navbar.json".
[INFO] 10 translations will be written at "i18n/en/docusaurus-theme-classic/footer.json".
[INFO] 4 translations will be written at "i18n/en/docusaurus-plugin-content-docs/current.json".
[INFO] 3 translations will be written at "i18n/en/docusaurus-plugin-content-blog/options.json".
log에서 볼수 있다싶이 5개의 다국어파일이 생성된것을 확인할수 있죠?
필요에 따라 수정해주시면 되는데, blog 기능만 사용할 경우 navbar.json,options.json,footer.json 3개 파일만 수정해주시면 돼요.
기본언어(defaultLocale)로 된 포스트는 /blog에서 작성하시면 되고, 다 작성된 글은 my-site/i18n/[locale]/docusaurus-plugin-content-blog 아래로 옮겨서 번역작업을 해주시면 됩니다.
my-site/i18n/[locale]/docusaurus-plugin-content-blog
│
│ # /blog 포스트에 대한 번역
├── authors.yml
├── first-blog-post.md
├── second-blog-post.md
│
│ # plugin옵션에 대한 번역
└── options.json
SEO - sitemap 설정
해당 기능은 production 모드에서만 활성화됨.
classic기본 탬플렛에는 이미 plugin-sitemap이 포함되여 있어, 아래와 같이 preset옵션만 주면 기능 활성화가 됩니다.
module.exports = {
  presets: [
    [
      '@docusaurus/preset-classic',
      {
        sitemap: {
          lastmod: 'date',
          changefreq: 'weekly',
          priority: 0.5,
          ignorePatterns: ['/tags/**'],
          filename: 'sitemap.xml',
          createSitemapItems: async (params) => {
            const {defaultCreateSitemapItems, ...rest} = params;
            const items = await defaultCreateSitemapItems(rest);
            return items.filter((item) => !item.url.includes('/page/'));
          },
        },
      },
    ],
  ],
};
i18n 기능을 사용시 언어별로 별도의 sitemap이 생성되니 꼭 주의하기 바랍니다.
Code blocks
Docusaurus로 갈아타게 된데는 막강한 Syntax highlighting 기능도 한목했습니다.
조금 의아했던 점은 Java, Bash같은 자주쓰는 언어도 기본옵션으로 지원되지 않는다는 점.. 지원언어 참고
다행히도 아래와 같은 옵션 적용으로 언어를 쉽게 추가할 수 있습니��다.
export default {
  // ...
  themeConfig: {
    prism: {
      theme: prismThemes.github,
      darkTheme: prismThemes.dracula,
      additionalLanguages: ['bash','java','properties']
    },
    // ...
  },
};
highlight-next-line, highlight-start, highlight-end 등 코멘트를 사용한 line-highlighting 기능도 지원됩니다.
Google 연동
Google Analytics 연동
해당 기능은 production 모드에서만 활성화됨.
이 또한 기본으로 탑재된 기능으로 preset옵션설정으로 바로 활성화가 됩니다.
module.exports = {
  presets: [
    [
      '@docusaurus/preset-classic',
      {
        gtag: {
          trackingID: 'G-999X9XX9XX',
          anonymizeIP: true,
        },
      },
    ],
  ],
};
Google Adsense 연동
Google Adsense 연동은 script로딩만 해주면 되는 부분이라 Docusaurus Scripts기능��을 활용하여 쉽게 연동할 수 있습니다.
export default {
  scripts: [
    {
      src: 'https://pagead2.googlesyndication.com/pagead/js/adsbygoogle.js?client=ca-pub-XXXXXXX',
      async: true,
      crossorigin: 'anonymous',
    },
  ],
};
마이그레이션
Blog전환을 할때 URL구조도 변하고 하면 broken link가 발생할수 있습니다. 이를 방지하기 위하여 일반적으로 URL 마이그레이션 작업이 필요합니다..이 또한 제일 걱정되는 부분이기도 하죠?
Docusaurus는 Markdown front matter의 slug 설정이나 리디렉션 방식으로 URL 마이레이션을 할수 있습니다.
Front Matter - slug
Docusaurus의 Front Matter에서 slug 속성을 사용하여, 블로그 게시물이나 페이지의 URL을 자유롭게 설정할 수 있습니다.
예를 들어, 아래와 같이 slug값을 주어 /2024/12/24/welcome 형식의 URL을 /welcome 으로 변경할수 있습니다.
---
title: "welcome"
slug: "/welcome"
tags: ["docusaurus"]
---

my doc
리디렉션
URL마이그레이션 할때 리디렉션 방식도 많이들 선택하는 방법중 하나죠. Docusaurus는 리디렉션 기능을 지원은 하나 client단 리디렉션입니다.
경험이 있는 분들은 아시겠지만 SEO 친화적인 리디렉션 방식은 Server-side redirects입니다.
The following table explains the various ways you can use to set up permanent and temporary redirects, ordered by how likely Google is able to interpret correctly (for example, a server side redirect has the highest chance of being interpreted correctly by Google). Choose the redirect type that works for your situation and site:
Server-side redirect (추천)
구글검색 같은 경우 서버 사이드 리디렉션을 사용하면 Page rank에 영향이 없다고 하죠.
관련 구글문서: General best practices for site moves
301, 302, and other server side redirects don't cause a loss in PageRank.
반면, 클라이언트 사이드 리디렉션은 가끔 검색 엔진이 이를 제대로 처리하지 못하거나, 새로 리디렉션된 페이지가 제대로 평가되지 않는 경우가 발생할 수 있습니다.
리디렉션 설정방법은 본이 호스팅 방식에 따라 아래 문서내용 참고바랍니다:
- Vercel: Vercel: redirects
- Netlify: Netlify: redirects
- Self hosting: 구글 문서 참고
- GitHub Pages: 서버단 리디렉션 지원이 안되는걸로 알고 있음.
Client-side redirect
서버단 리디렉션을 하기 어려운 조건��인 분들이나, SEO에 대해 신경 쓸 필요없는 분들은 가볍게 아래와 같이 @docusaurus/plugin-client-redirects 사용하면 됩니다.
@docusaurus/plugin-client-redirects설치:
npm install --save @docusaurus/plugin-client-redirects
config 예시:
export default {
  plugins: [
    [
      '@docusaurus/plugin-client-redirects',
      {
        fromExtensions: ['html', 'htm'], // /myPage.html -> /myPage
        toExtensions: ['exe', 'zip'], // /myAsset -> /myAsset.zip (if latter exists)
        redirects: [
          // /docs/oldDoc -> /docs/newDoc
          { to: '/docs/newDoc', from: '/docs/oldDoc',},
          // Redirect from multiple old paths to the new path
          { to: '/docs/newDoc2', from: ['/docs/oldDocFrom2019', '/docs/legacyDocFrom2016'],},
        ],
        createRedirects(existingPath) {
          if (existingPath.includes('/community')) {
            // Redirect from /docs/team/X to /community/X and /docs/support/X to /community/X
            return [
              existingPath.replace('/community', '/docs/team'),
              existingPath.replace('/community', '/docs/support'),
            ];
          }
          return undefined; // Return a falsy value: no redirect created
        },
      },
    ],
  ],
};
배포(CI/CD)
호스팅 관련해서는 Vercel, GitHub Pages, Netlify 등 본인이 익숙한 platform을 선택하면 됩니다.
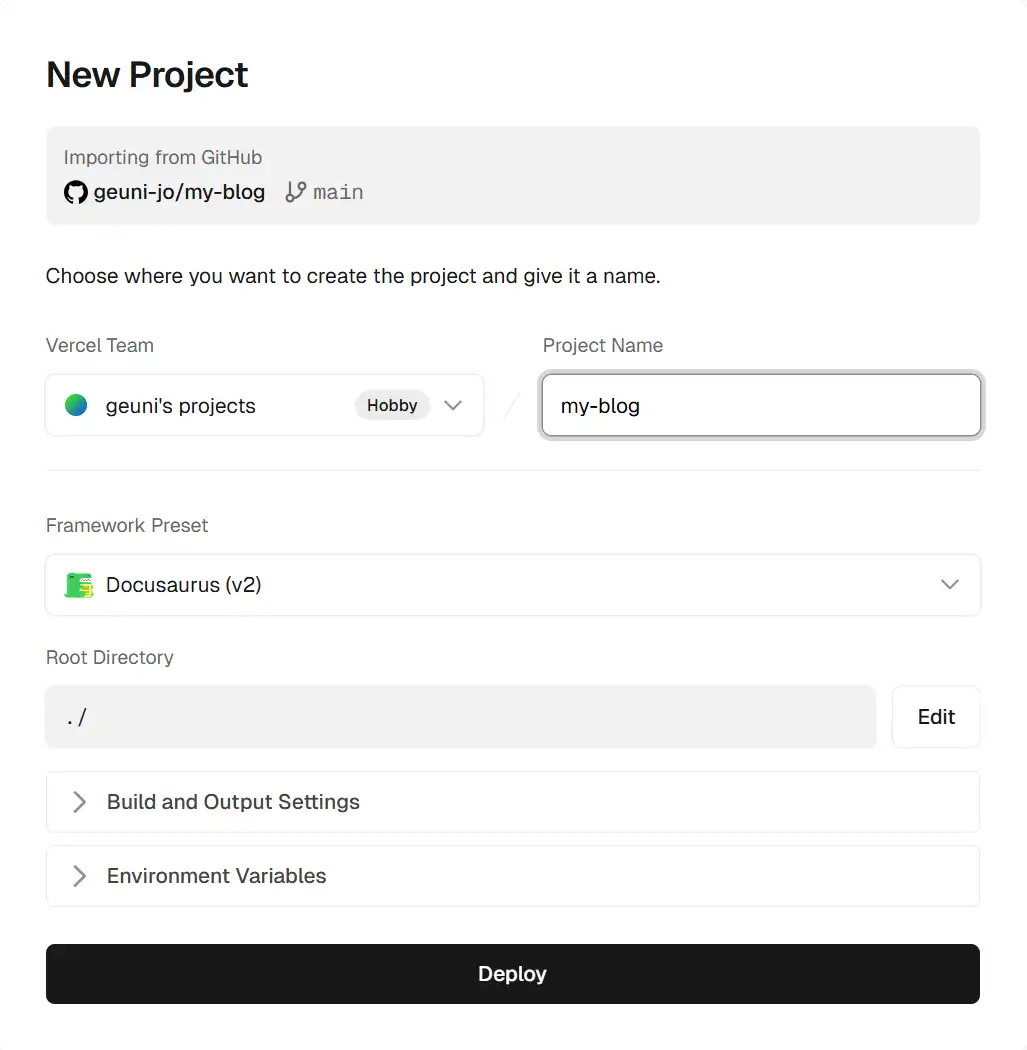
수년간의 Vercel사용자로 초보자분들께는 Vercel 이용을 추천드립니다. 대시보드 클릭클릭으로 Gihub 연결/import해주면 CI/CD가 자동으로 구성됩니다.
How to Deploy a Docusaurus Site with Vercel 참고

마무리하며
처음부터 홈페이지 문서를 파다보니 기본적인 setup에서 마이그레이션까지 주말 이틀을 날렷네요.
이번 포스트에서는 개인적으로 사용한 기능들을 간단히 정리해 보았습니다. 필요한 분들께 작은 도움이 되기를 바랍니다.